I was trying to find a suitable memorial for poor Rusty the digger driver, and I came up with this. I think a dog-loving Australian yodelling cowboy bush balladeer guitar player with a rhyming name is a pretty appropriate candidate to commemorate a gentle English digger driver who worked with his dog in the cab, don't you? Oh, and in case any of you were thinking of emitting a scornful snort at any point in the performance, I'd like to point out that during his lifetime, Slim Dusty was considered an Australian National Treasure. National Living Treasure is a status created and occasionally updated by the National Trust of Australia's New South Wales branch, awarded to up to 100 living people. Recipients were [sic] selected by popular vote for having made outstanding contributions to Australian society in any field of human endeavour. (Wikipedia)
So there!
https://www.youtube.com/watch?v=jozYWe4l_qY
Anyway, it turns out that our Rusty hasn't gone to the great scrapheap in the sky after all, and he's going to be here tomorrow with his digger and probably his dog too, to help the redoubtable sappers fill in the gaping gaps behind the redoubt. Strange that, isn't it? I mean, who has a dog called "too"?
Armistice
Well, actually two armistices. The first one came after a visit from the Structural Engineer (I like him, so I'm giving him capital letters) who expressed considerable concern for the safety of anyone working in the bottom of our trenches. There were several factors at play here:

- The walls falling in, sometimes in big lumps, always unpredictably
- The depth of the trench - over two metres so far, and only just hit the top of the house foundations
- Rain - and more rain predicted
He said he would talk to the builder (they're all mates who have worked together before). The following day, after another collapse, the single piece of shuttering they'd put up fell inwards under the weight of mud.
 |
| single piece of shuttering, still up (just) |
So there was Dean in the bottom of the trench, gallantly trying to shovel mud out from behind the shuttering, whilst standing between it and a huge mound. The fallen earth had left a two foot deep overhang, which, if it had chosen to fall, would surely have broken both is legs and trapped him under four tons of mud. So I went all managerial and told him to get out of there while we had another go at trying to put some safety into the whole show. After all, massive loss of life has been tried before, and it didn't result in a very nice extension in 1914.
 |
| Armistice #1. Overhanging stuff. Our brave boys stand ready (on top of the overhang, natch) |
Phone calls ensued. The Structural Engineer talked to the builder, and the builder talked to the digger driver, and the digger driver pointed out that if he did what the Structural Engineer wanted (which was to grade all the sides of the hole out to 45° slopes) he would then be unable to get the digger out of the garden, because of the resulting step up to the edge of the drive, and also unable to access parts of the ditch. Hmmm.
Meanwhile, I went to sleep. I expected someone to call me and explain what they were going to do, but...
Eventually I woke up ("in bear emerging from hibernation" mode) and went to see what was going on. Dean was back in the trench, but at the other end, where there wasn't an overhang. Nothing much else seemed to have changed.
At this point I though, "Well I've had my say"; so I told Dean that I would be on his side if he decided he didn't like it at any point, and let them get on with it. Here's what they did:

That's Dean, who is about 5' 10", below the top of the shuttering, which is about 3ft below ground level - so roughly 9ft deep! Anyway, the building inspector came and said it was good; and so, it was good. Next day they finished off the box,
 |
| finished box |
and the concrete came...
 |
| concrete - actually nearly all gone when this was taken |
and our stout-hearted yeomen set to with barrows (!) to fill the thing up
 |
| A barrow boy |
I must admit that my heart sank slightly at this point as I thought it would take longer than the remaining hours of daylight to do this, but amazingly they finished it in about an hour and a half.
And then they tucked it up for the night in yet more OSB and we all went to bed. The second armistice was signed, and the collapsing garden gave up the fight in the face of surprisingly good weather, 30-odd tons of concrete and a lot of backfilling.
When it was all over, I was talking to Kieran the digger driver (still no word of Rusty, by the way. I think the Wing Commander must have written a letter to his wife) who said he was just about to go on a course to renew his digger driving ticket, which had in fact already run out. I said, "Oh, so you're probably not insured then?" He looked quite wistful, and was unusually quiet for a few moments. "I suppose not", said he.
Shelling
Here on the front line. the distinction between a trench and a bomb crater is somewhat academic. It's safe to say that terms like "patio" and "garden" have somewhat lost their meaning, too. We do understand "mud hole" and "river" though.
Here's the latest aerial surveillance photo after a prolonged bout of Rain (or Rhine; past tense, Rhône). You can clearly see the course of the Rhône:
Needless to say, all this unexpected exposure of what should rightly be kept underground is putting a bit of strain on the plucky civilian population. How long will this terrible Rhine Garrone? It's the heaviest we've ever Seine (past tense: Saône). Isère anything we can do? Seemingly, not a Lot. It's enough to make one quite Ill. Just have to Marne up and take it on the Dordogne, I suppose. (If anyone can explain that last one to me, please do so in the comments).
Anyway, we are consoled by the delivery of a new digger, late this afternoon, and the possibility of actual building-style progress tomorrow. Alas, there is still no word on the fate of Rusty, who apparently went missing in action somewhere today and hasn't been heard of since.
Here's the latest aerial surveillance photo after a prolonged bout of Rain (or Rhine; past tense, Rhône). You can clearly see the course of the Rhône:
 |
| the Rhine, of course! |
The piece of lawn which used to support the top of the ladder now supports the bottom of it, after yet another collapse. Meanwhile, the sappers have been tunnelling under the drive in a bid to thwart the next wave of shelling - at least that's what it looks like.
 |
| Ouche! |
Anyway, we are consoled by the delivery of a new digger, late this afternoon, and the possibility of actual building-style progress tomorrow. Alas, there is still no word on the fate of Rusty, who apparently went missing in action somewhere today and hasn't been heard of since.
Somme people...
We've decided to start a Battle of the Somme re-enactment society, based in the site of the old patio.
After a couple of hours mucking about with buckets and OSB, trying to make the trenches safe with shuttering, our gallant building crew (but sadly not including Rusty the digger man, who had a previous commitment elsewhere today) gave up and went home, following a near miss in which young Ewan became partially submerged in mud. We never intended to risk to life and limb, after all. And we aren't on a very strict timescale either, so no worries. Apparently when Rusty returns, it will all be much better.
Pity really, it's a lovely day...
After a couple of hours mucking about with buckets and OSB, trying to make the trenches safe with shuttering, our gallant building crew (but sadly not including Rusty the digger man, who had a previous commitment elsewhere today) gave up and went home, following a near miss in which young Ewan became partially submerged in mud. We never intended to risk to life and limb, after all. And we aren't on a very strict timescale either, so no worries. Apparently when Rusty returns, it will all be much better.
Pity really, it's a lovely day...
 |
| Battle scene, photographed from a passing Bristol Scout |
Curtains
We don't really do curtains very much in the house of Sears, but the lovely Jackie decided that we need a fabric enhancement the bit of glass beside the front door. This particular curtain-like entity would be hand-made of various pieces of exotic fabric (in middle eastern styles) collected over several years in our travels abroad, sewn together into a vertical pennant by the lovely Jackie herself. The whole assembly would be supported on a bracket, which would need to pivot so that the pennant could rest against either wall or window, ninety degrees apart. Obviously, this pivoting bracket would need to be custom made. Equally obviously, the most fulfilling solution would be to make it out of bits of scrap found lying around the place...
One obvious source would be the several curtain poles which came with the house, now forlornly unused because of our general preference for blinds. Here's a candidate:
When you take it apart, there are some useful things inside the fixing system. And I had a few other bits in stock.
The two threaded bits on the wooden block are RivNuts; when you squash them into a hole in a piece of metal, they rivet themselves on, and you have a strong thread attached to a thin sheet. I have those in stock. The piece of aluminium underneath everything else was salvaged from Cambium Networks when they scrapped a load of them; I can't remember what they were originally. It's about 3mm thick, and has those bosses attached, but a swift blow with a suitable punch removes them quite easily (for use for something else).
From these bits, I made a bracket, a cut down top post cover, and a rather complicated block:
I also cut down the shiny post gizmo that screws onto the ceiling so that I could get it further into the corner, but I forgot to take a picture of that part before it got installed. You get the idea from the cut down cover shown above.
The idea is that my little bracket gets screwed to the wall at the bottom, and then the roofing screw shown above holds the wooden cover on, at the same time as protruding upwards to form the bottom pivot by threading into the second RivNut, which is glued inside a hole in the bottom of the post. The post then pivots on the thread, like the kingpin end of the bottom wishbone on an MG Midget. But without the grease nipples.
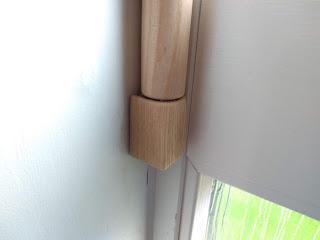
When it's all assembled, it looks like this:

and the ends in close up:

One obvious source would be the several curtain poles which came with the house, now forlornly unused because of our general preference for blinds. Here's a candidate:
 |
| a candidate |
 |
| useful things... |
From these bits, I made a bracket, a cut down top post cover, and a rather complicated block:
 |
| One bracket, a cut down cover, and a rather complicated block |
Or, looked at right side up, and with the addition of a long roofing screw, like this:
 |
| right side up |
The idea is that my little bracket gets screwed to the wall at the bottom, and then the roofing screw shown above holds the wooden cover on, at the same time as protruding upwards to form the bottom pivot by threading into the second RivNut, which is glued inside a hole in the bottom of the post. The post then pivots on the thread, like the kingpin end of the bottom wishbone on an MG Midget. But without the grease nipples.
When it's all assembled, it looks like this:

and the ends in close up:


Oh, and the top bar (from which the pennant will hang) is made from a piece of rather nice hardwood which was part of the packaging of our Miele dishwasher (I think it was three years ago). And so, the whole thing was done with no new parts purchased at all, which I think is rather a delight.
The best bit of the whole thing was using the router as a spindle moulder by clamping it upside down in the vice...
Then you have to clamp blocks to the workpiece to make it big enough to slide around on the thing:
(The hammer is just to stop it all falling off while I took the picture) I pondered trying to use a fence to guide it, but in the end I did everything hand-held. All in all, it worked surprisingly well, with no loss of fingers.
In other news, it's curtains for the patio, because we've started having the extension built which will become the dining room in due course. So far, they've dug down over two metres and haven't got to the top of the foundations yet! The hole keeps getting bigger (sideways) and filling itself in as the sides collapse, too. It's all slightly scary, but fortunately we are paying someone else to do the worrying, and Rusty the digger man seems quite good at excavating.
I expect there will be more news of the hole soon... In the meantime, we are sticking our fingers in our ears and going "La la la" a lot.
The best bit of the whole thing was using the router as a spindle moulder by clamping it upside down in the vice...
 |
| spindle moulder anyone? |
 |
| big enough to slide around |
(The hammer is just to stop it all falling off while I took the picture) I pondered trying to use a fence to guide it, but in the end I did everything hand-held. All in all, it worked surprisingly well, with no loss of fingers.
In other news, it's curtains for the patio, because we've started having the extension built which will become the dining room in due course. So far, they've dug down over two metres and haven't got to the top of the foundations yet! The hole keeps getting bigger (sideways) and filling itself in as the sides collapse, too. It's all slightly scary, but fortunately we are paying someone else to do the worrying, and Rusty the digger man seems quite good at excavating.
 |
| Rusty the digger man getting started |
Keyhole Surgery
Established readers will remember that last year, the lovely Jackie and I bought a brand new camper van featuring a bed that disappears into the ceiling using an electric motor. Obviously the designers got a bit carried away at this point, because they also installed an electrically height-adjustable table. I suppose they thought that the "touch of a button" concept shouldn't be compromised by having to actually do anything to get things out of the way underneath the majestically descending 4-strapper bed. Anyway, for some reason they chose to fit a keyswitch to operate the table. Here is is.
After a while, this switch got so loose that you had to use two hands to operate it - one to hold the switch, and one to turn the key.
At this point, any normal person would have just taken it back to the dealer to get it fixed, but obviously being me, I had to have a look first. The switch is attached to the box it sits on by a screw installed from behind - there's no retaining ring on the front - and the box is, as you can see, it pretty much filled by the water tank. You can see the switch through that hatch, and even just about touch it, but you can't get your hand to it properly. The box has some brackets holding the sides together that you can't get at. None of it comes apart in any obvious way.
And so, unusually, I did the sensible thing. I booked it in, and drove it back to Marquis at Lee Mill, and showed the nice service man exactly what the problem was, and left it with them for and hour or two while I had breakfast at Tesco's (Eggs Royale: like Eggs Benedict, but with smoked salmon instead of ham. Very good!) Then I had a long discussion with the nice service man about the subtleties of the operation and resetting of the automatic frost valve, which stops the heater freezing up, but also (if you are unwary) dumps all the water underneath when you turn the pump back on. Then everybody thanked each other for being so nice, and I drove home again.
It wasn't until some weeks later than I noticed that the keyswitch, now firmly attached to the van, no longer actually operated the table.
At this point, any normal person would have got very irate on the phone, demanded immediate special treatment and driven to Lee Mill for another excellent breakfast, but obviously being me, I had to have a look first. It turned out there were two problems:


 |
| Keyswitch |
At this point, any normal person would have just taken it back to the dealer to get it fixed, but obviously being me, I had to have a look first. The switch is attached to the box it sits on by a screw installed from behind - there's no retaining ring on the front - and the box is, as you can see, it pretty much filled by the water tank. You can see the switch through that hatch, and even just about touch it, but you can't get your hand to it properly. The box has some brackets holding the sides together that you can't get at. None of it comes apart in any obvious way.
And so, unusually, I did the sensible thing. I booked it in, and drove it back to Marquis at Lee Mill, and showed the nice service man exactly what the problem was, and left it with them for and hour or two while I had breakfast at Tesco's (Eggs Royale: like Eggs Benedict, but with smoked salmon instead of ham. Very good!) Then I had a long discussion with the nice service man about the subtleties of the operation and resetting of the automatic frost valve, which stops the heater freezing up, but also (if you are unwary) dumps all the water underneath when you turn the pump back on. Then everybody thanked each other for being so nice, and I drove home again.
It wasn't until some weeks later than I noticed that the keyswitch, now firmly attached to the van, no longer actually operated the table.
At this point, any normal person would have got very irate on the phone, demanded immediate special treatment and driven to Lee Mill for another excellent breakfast, but obviously being me, I had to have a look first. It turned out there were two problems:
- The nice service man had omitted to reconnect the plug connecting the switch assembly to the harness.
- There was a loose wire hanging off the switch.
After a bit of yoga-assisted groping around the end of the water tank though the hole for the seat belt (not shown above) , I managed to reconnect the plug. And by touching the loose wire against the empty terminal on the switch using braille, I was able to prove that reconnecting this wire would make it all work again. But how to reattach it? Here's the switch seen from the hatch (you can see the loose black wire too, on the right)

Here's the scene from the top, including my size 11 foot for scale, with the switch under my heel.

You can see that the switch is a long way down the rabbit hole. You'd need a very long screwdriver. But there's no chance of holding the wire in place and doing up the screw and seeing what's going on, all at the same time, without some kind of special tool...
I like it when you need a special tool. Here's what I came up with, shown here grasping a rubber band:

And now in slightly closer-up:
 |
| grasping a rubber band |
The other thing in the picture is my newly acquired extra-long #2 Pozidrive screwdriver. One should have one for just such occasions, no? Meanwhile, here's the business end of the special tool:
 |
| business end |
And at the other end:
 |
| leisure end? pleasure end? |
When you pull the wire back, the prongs retract and clamp whatever is between them at the time against the end of the Biro. This design isn't my invention, it's shamelessly stolen from the tiny little clips that Tektronics and others supply with their logic analysers, for connecting to the tiny little legs on tiny little electronic components. Those ones have a spring inside, but mine has a ratchet clip to hold it shut; the wire loop at the back clips over the head of the carriage bolt. The carriage bolt and the Biro are stuck together using the hobbyist's favourite tool, the hot glue gun. In my view, there is only one sort of wire for this kind of work - stainless steel locking wire. It's used on racing cars and aeroplanes to stop things coming undone, and it's designed to stay where you bent it, whilst being quite strong and a little bit springy. When I had a microlight, I bought a reel, and it's been extremely useful for all kinds of things ever since.
Anyway, here is the tool in operation, seen from behind the head of the carriage bolt
 |
| approaching the command module |
OK, so you can't really see anything at all in this picture, but you can take it from me the clamp is successfully holding the wire in place and the screwdriver is in there too, poised for rotation.
And in this way, I fixed what the nice service man hadn't, and the van is 100% electric again.
There are a few lessons that can be drawn from this episode. You can never have too many sizes of screwdriver, for example. Or perhaps: locking wire is just as versatile as everyone's favourite, fencing wire, but on a smaller, more intimate scale. Or maybe: if a job's worth doing, it's worth making a special tool for. But I suspect the real moral of the story is: don't assume those pesky service people at the main dealers will have tested their own repair before they give it back to you.
Sawdust
The other day I found myself pondering how to cut some bits of wood down to size for narrow shelves. In the past, I would have grabbed the first bit, measured it up, marked it out, and clamped another piece of wood with a straight(ish) edge on as a guide, while clamping the whole thing to the bench, or some extension to the bench, or something, in such a way that running a hand held circular saw down the guide wouldn't saw the bench in half. And then done it all again for the next piece. And so on. This classic DIY technique will work, but... (step)son Leo has a table saw. With a table saw you can just set the guide using the built-in rule, and push the workpiece through the saw - that's it. To do the next piece, you just push it through - no tedious marking each piece out separately. So, I thought, I could take the (few) pieces of wood to Leo's... or I could just get on with it the old-fashioned way... or I could buy myself a table saw...
So I started investigating on the world wide web-o-net. It turns out you can buy an entry-level table saw from Screwfix which has a desirable 40-tooth blade, a monstrous 2hp motor, gets pretty good reviews, and comes with free delivery, all for the princely sum of £99.99. Really. https://www.screwfix.com/p/titan-ttb674tas-254mm-table-saw-230-240v/9486j
You have to assemble it yourself, and reviewers mention that there are lots of nuts and bolts involved (as if that's some kind of drawback!). So, I got one. And it's all true! Lots of nuts and bolts, and it works pretty well. The guide is only held at one end, which is a bit junior, but it's not too bad really. It may not be the most accurate device ever, but it certainly works.
It also make a horrendous amount of sawdust! As you can see, it's fitted with pipes for a dust extraction system, so I started wondering about making one - possibly using the nice universal motor from the old washing machine. Poor thing, it had started to behave rather erratically, stopping in odd places, but only in certain wash cycles. I was all for mending it (or course), whereas the lovely Jackie wanted to throw it out and buy a new one immediately. I did have a slight concern that it might be a bit hard to find the fault, because individually, all the bits seemed to work OK. There were a few moments of stalemate, but then she pointed out that the poor thing was more than 18 years old, so it had served us well enough (including a couple of repairs along the way to keep me amused), and I relented. We bought a new one, and I stripped down the old one for interesting parts.
All that's needed is to connect the (small) VAX hose onto the (big) dust extraction outlet.


So I started investigating on the world wide web-o-net. It turns out you can buy an entry-level table saw from Screwfix which has a desirable 40-tooth blade, a monstrous 2hp motor, gets pretty good reviews, and comes with free delivery, all for the princely sum of £99.99. Really. https://www.screwfix.com/p/titan-ttb674tas-254mm-table-saw-230-240v/9486j
You have to assemble it yourself, and reviewers mention that there are lots of nuts and bolts involved (as if that's some kind of drawback!). So, I got one. And it's all true! Lots of nuts and bolts, and it works pretty well. The guide is only held at one end, which is a bit junior, but it's not too bad really. It may not be the most accurate device ever, but it certainly works.
 |
| £99.99! |
Anyway, I was going to need a whirly chamber thingy from a bagless vacuum cleaner to catch the sawdust, so the next time I was at the "recycling centre" I took a look in the "small electrical" skip. Nothing. Who'd have thought it? Usually there are a few dead Dysons in there at least, but not this time. So I tried Gumtree - and got a VAX vacuum for a tenner, from near where we used to live. Of course, this one actually works, somewhat spoiling the project. In fact it's practically new; it was left behind in a rental flat by the departing tenants.
 |
| dearly departing tenants... |

I thought of a few possible ways to do it before I remembered the washing machine. It was a washer-dryer, so it had lots of ducting and rubbery bits around the drum. And lo! It came to pass that the perfect part was already on site. Here it is, installed.

Note the absence of any need for clips (Jubilee or otherwise), tape, or any other bodgery. It's all self-supporting. The big end fits snugly round the saw fitting, and the little end fits snugly into the VAX hose. The redundant corrugated hose sticking out to the left is blocked by a snugly-fitting plastic bottle top. Sadly, although the picture below make it look like evidence of my successful achievement of cold nuclear fusion, it's really just a green plastic bottle top illuminated by my phone camera's flash.
 |
| Cold nuclear fusion |
Anyway, the whole arrangement works remarkably well. There's a footswitch on the vacuum cleaner to turn on the extraction while you're busy at the saw controls, and with the handle removed, the whole thing fits underneath the saw table. Marvellous!
The saw tilts, so I was able to make two 6ft long 45 degree wedges to stabilise the piano room's new IKEA Billy corner bookcase installation. Unusually, the IKEA solution was not really good enough, and left gaps between the upright edges. No gaps for me!
Writing about the project being spoilt by getting one that still works reminds me of an episode from my youth. When I was about 15, I started to get interested in electronics. My father, who was an accountant, had a client who ran a TV shop with a repair shop in the back, so I asked if I could get a scrap TV to take to bits - you know, for "projects". When it turned up, it was a fully working TV, which was obviously too good to take to bits. Also, I now had a TV in my bedroom. Thus were my early ambitions of earnest industry turned into idleness and lethargy by the generosity of a kind man. Still, the idleness and lethargy are turning out to be quite useful in the long run. They have much more application in today's world than a modest understanding of thermionic valve circuitry.
Writing about the project being spoilt by getting one that still works reminds me of an episode from my youth. When I was about 15, I started to get interested in electronics. My father, who was an accountant, had a client who ran a TV shop with a repair shop in the back, so I asked if I could get a scrap TV to take to bits - you know, for "projects". When it turned up, it was a fully working TV, which was obviously too good to take to bits. Also, I now had a TV in my bedroom. Thus were my early ambitions of earnest industry turned into idleness and lethargy by the generosity of a kind man. Still, the idleness and lethargy are turning out to be quite useful in the long run. They have much more application in today's world than a modest understanding of thermionic valve circuitry.
Subscribe to:
Posts (Atom)